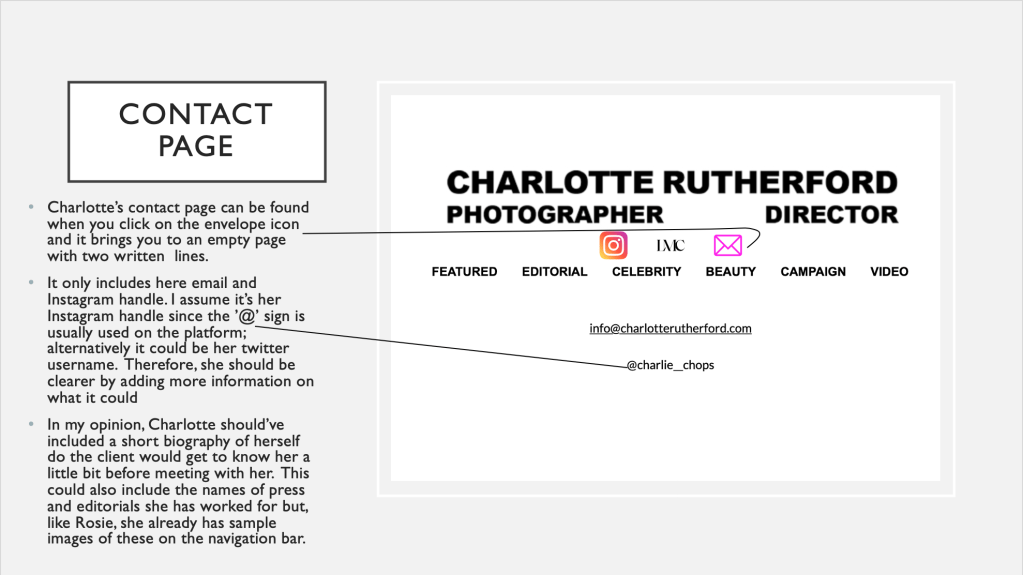
As mentioned these are my final images and I decided to experiment by adding textures of paint on top of the images.
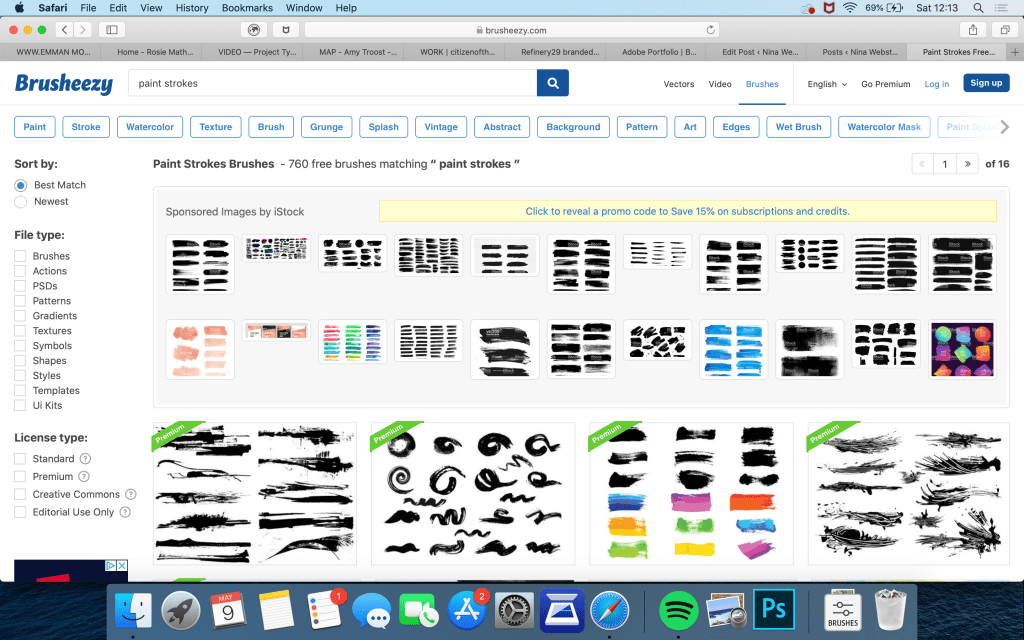
Firstly I looked for paint brushes for photoshop online for my brush effect on top of the images. Then I added all the photos into lightroom so I can crop the images, fix the white balance, etc.
Sample image that didn’t make the final cut
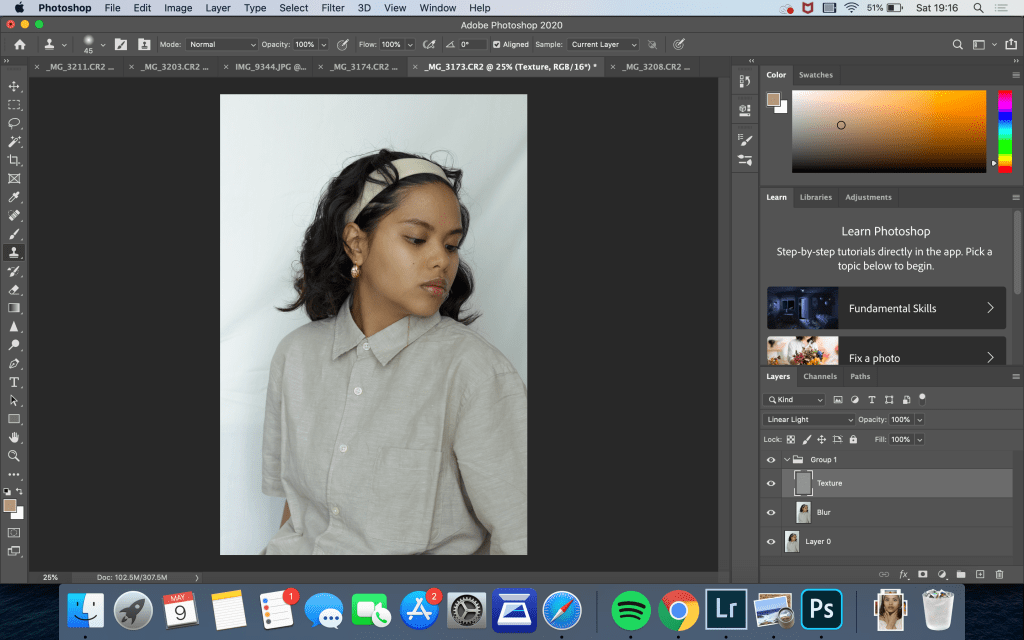
Afterwards, I transferred edited the images on photoshop using the frequency separation method and played around with adding scratches ,brush strokes, and grin as wells as changing the saturation to see what the effect would be.
Sample image that didn’t make the final cut
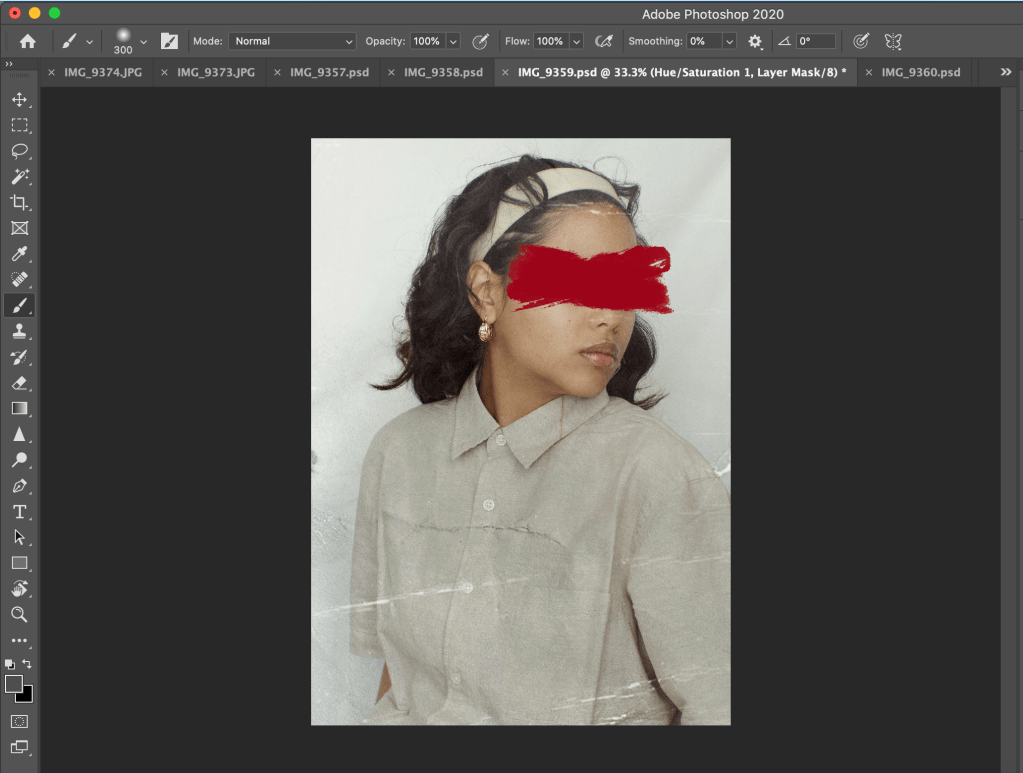
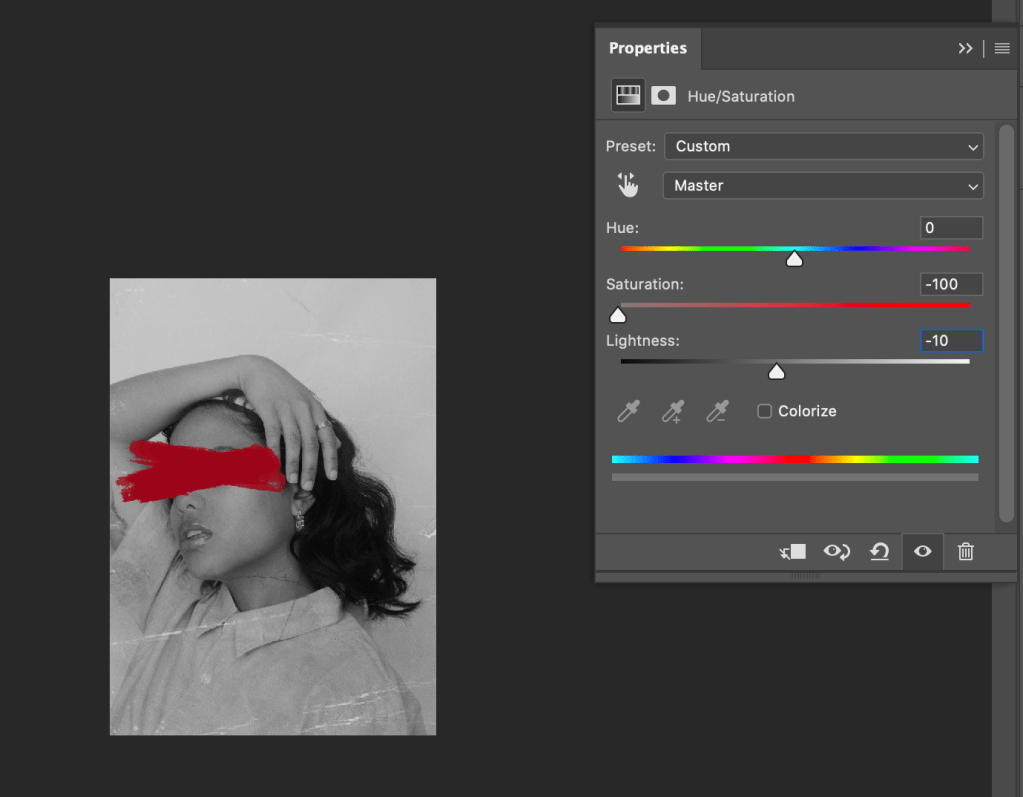
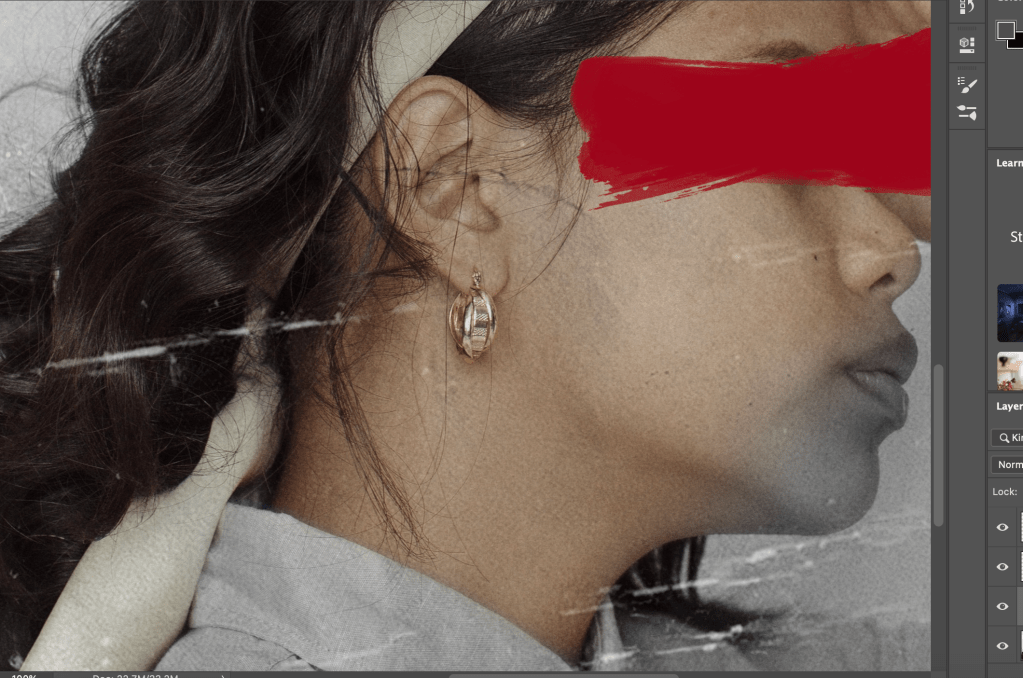
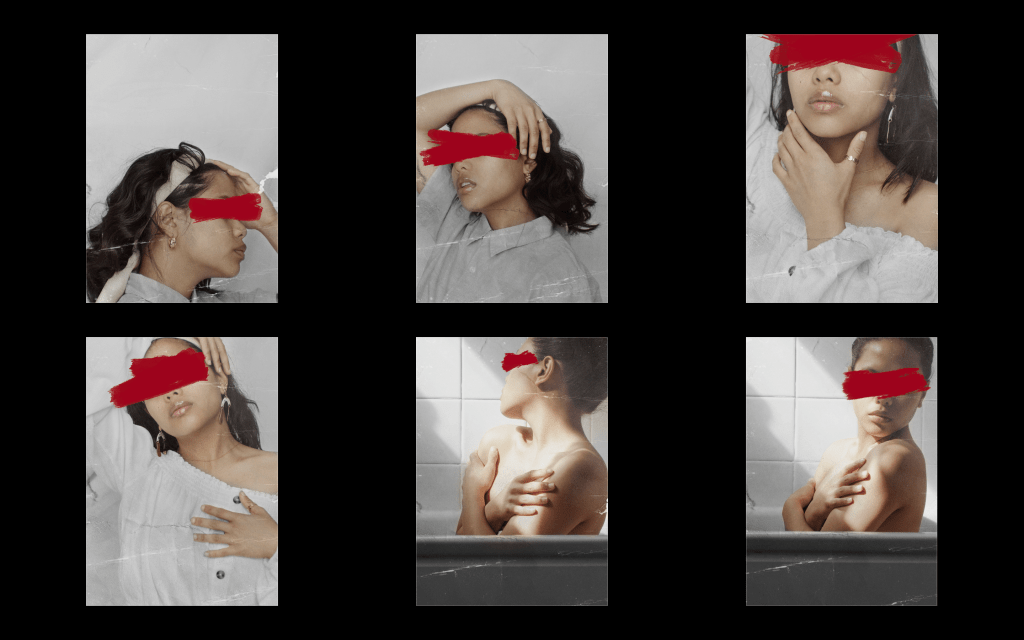
I then thought of changing the image to B&W and experimenting with only adding colour to my face while keeping the brush stroke to focus the attention on this area.
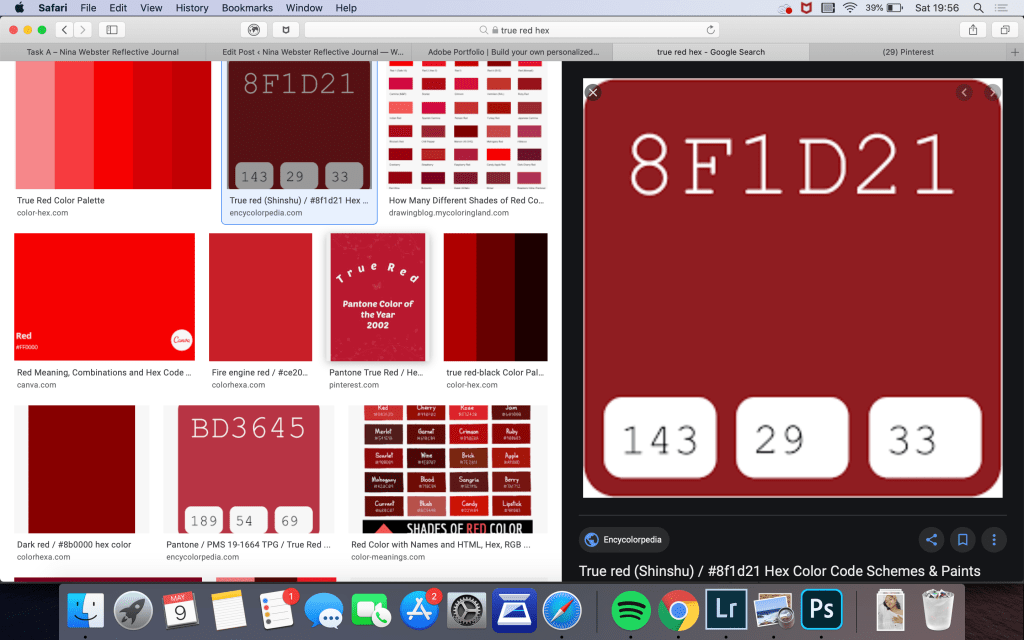
I ended up doing this for all the images. Also I made sure to research the right tone of red for the brush stroke and I chose red since it is a very emotionally intense colour, suiting my self-reflection theme.
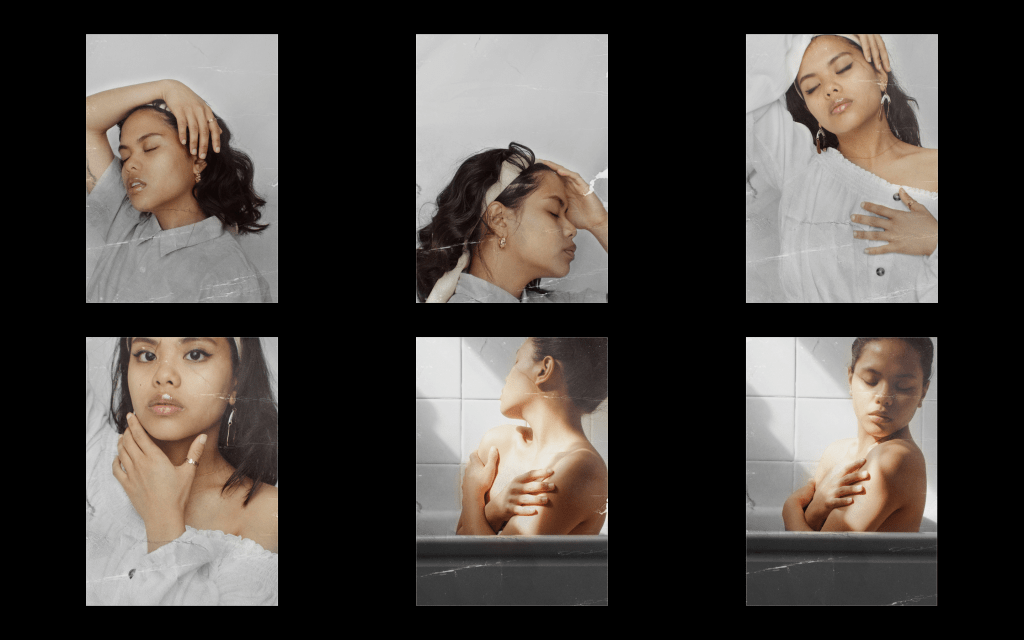
Finished results
After editing I asked my family whether they like the red brush across my face, however, majority of the votes preferred the ones without the brush stroke so I removed it and actually decided to increase the saturation on the areas that are coloured to enhance my skin tone.
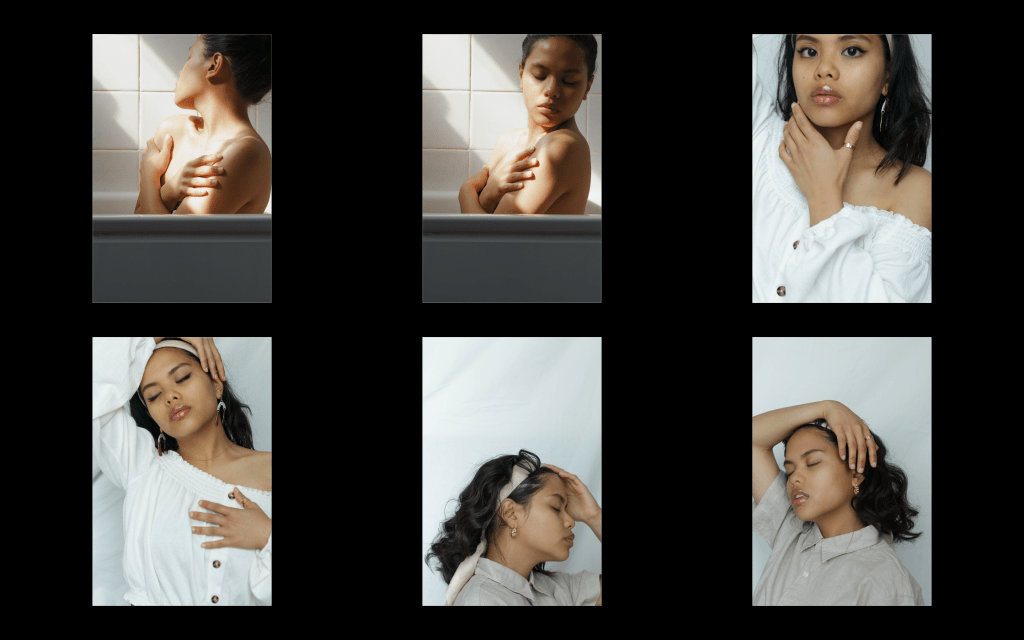
Below are the finished images.
Overall I am satisfied with the finished results and would like to continue and improve this series by taking more self-portraits and be more comfortable in front of the camera.
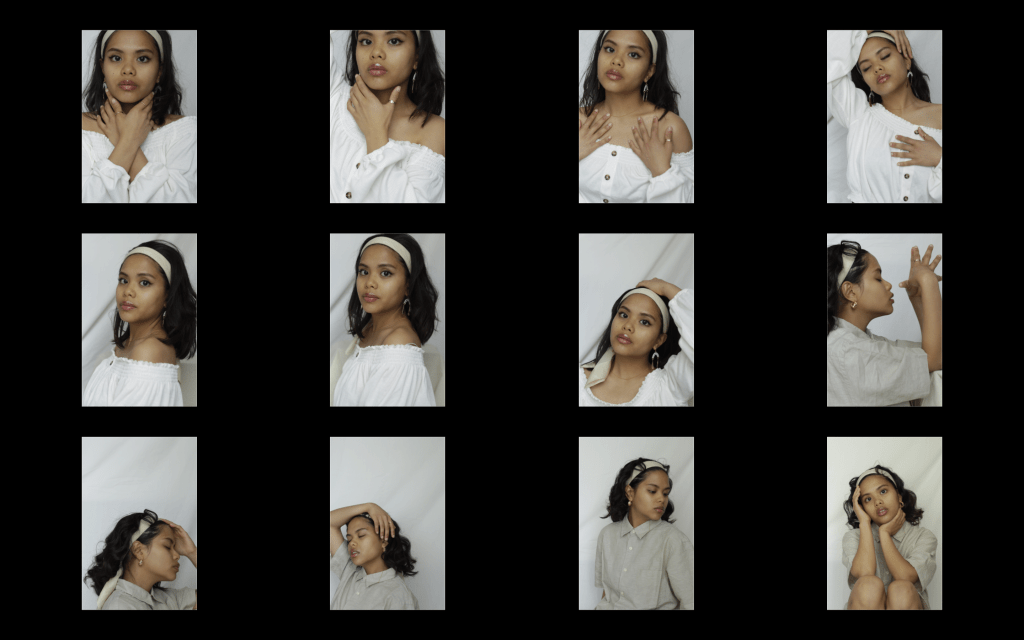
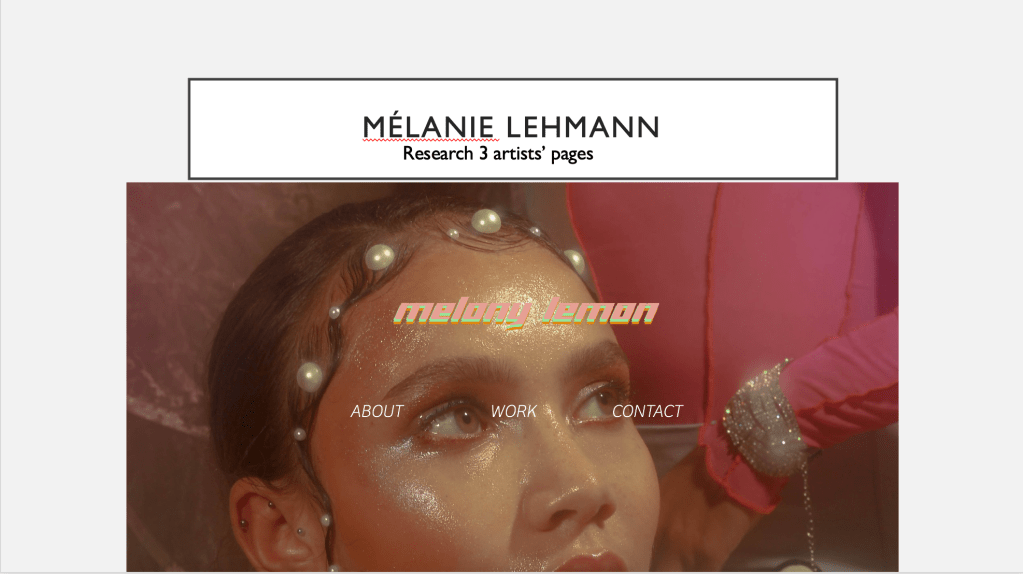
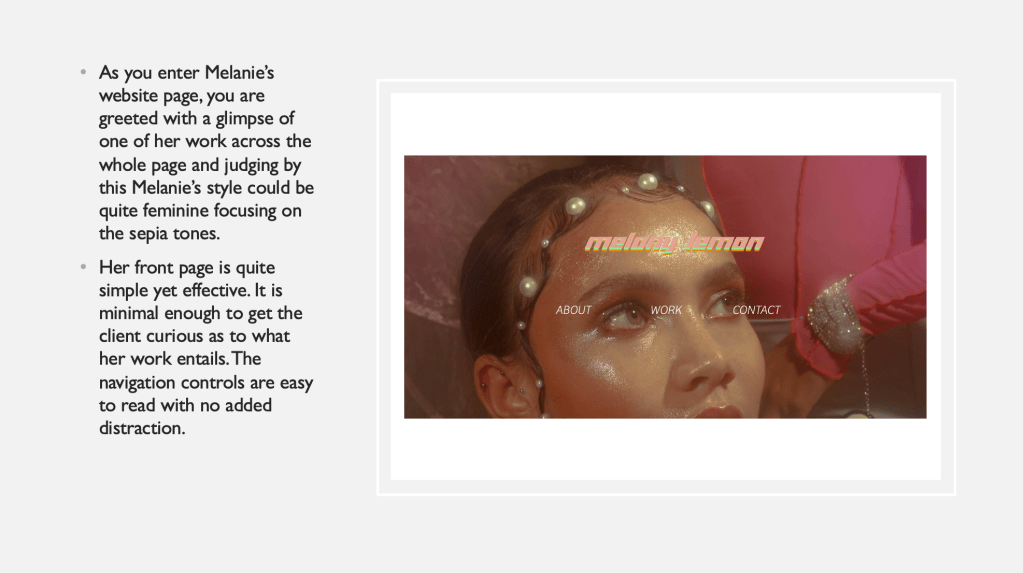
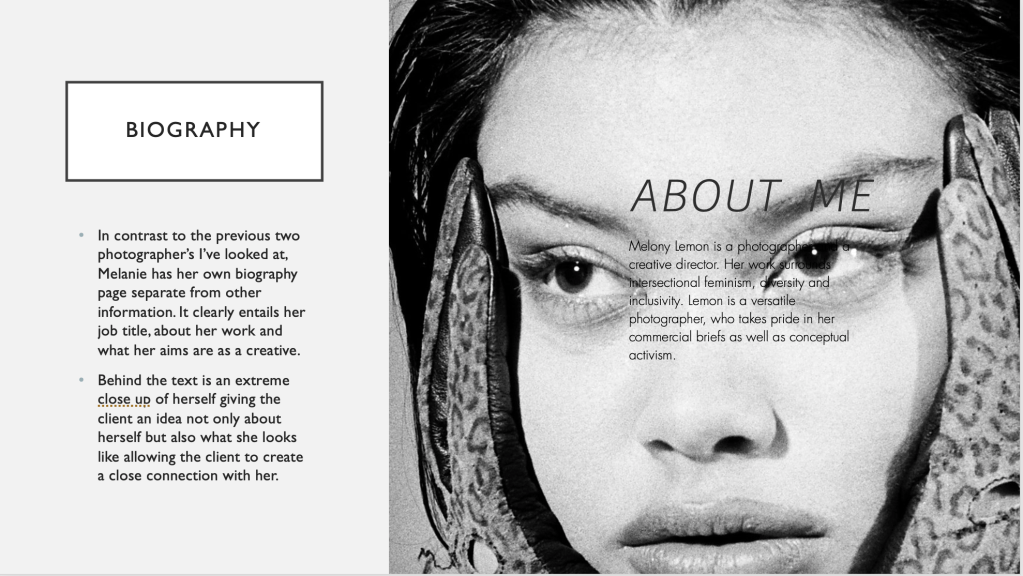
For the final shoot I decided to have two different styled outfits. One of which is quite laid back and baggy and the other is feminine and casual.
Sample images from the shoot
I took a few pictures for each outfit as I wasn’t sure whether I liked them or not, however, I went onto pinterest after the shoot and browsed through images that would help me when editing these pictures.
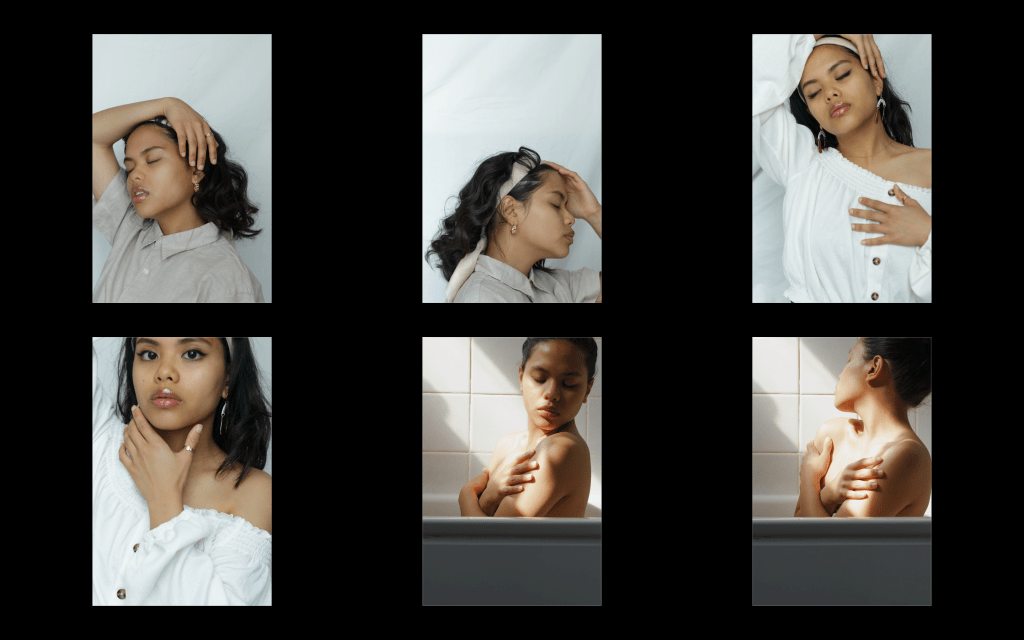
Below are the final images I decided to choose. I thought of using two images from each shoot/outfit to portray my self-reflection or how I feel in my surroundings and clothing.
Final ImagesPinterest
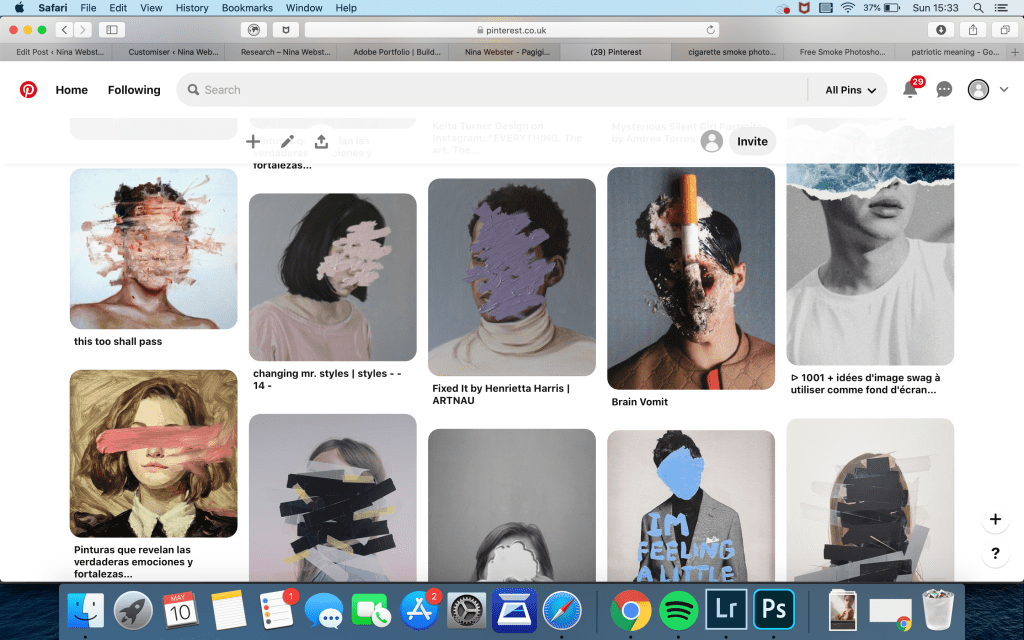
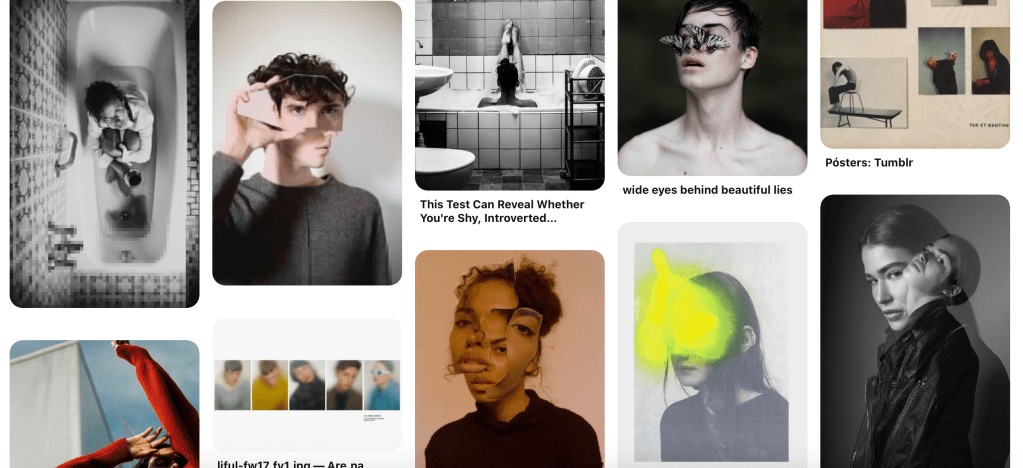
I came across images that are edited/ painted over the eyes/face of the subject and decided to take inspiration and try this on my final images.
On pinterest I made a moodboard dedicated to poses that would help me when I’m doing my shoot. This is also to help with future shoots in case i need a guide for models’ or myself.
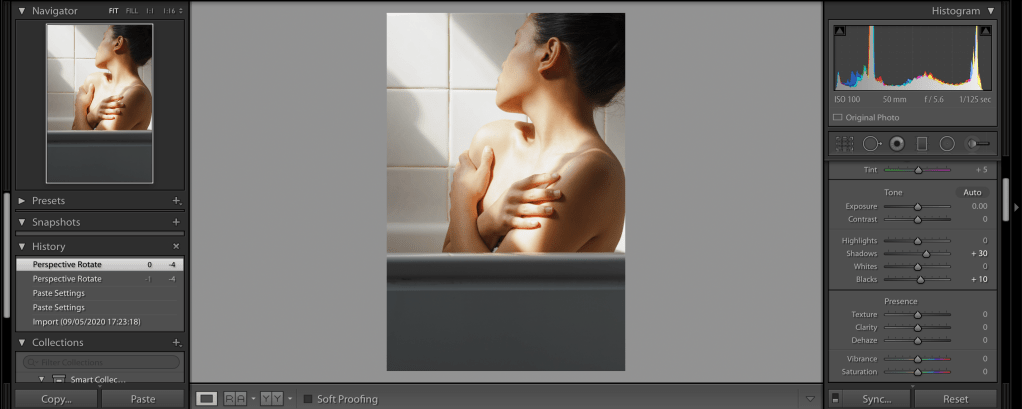
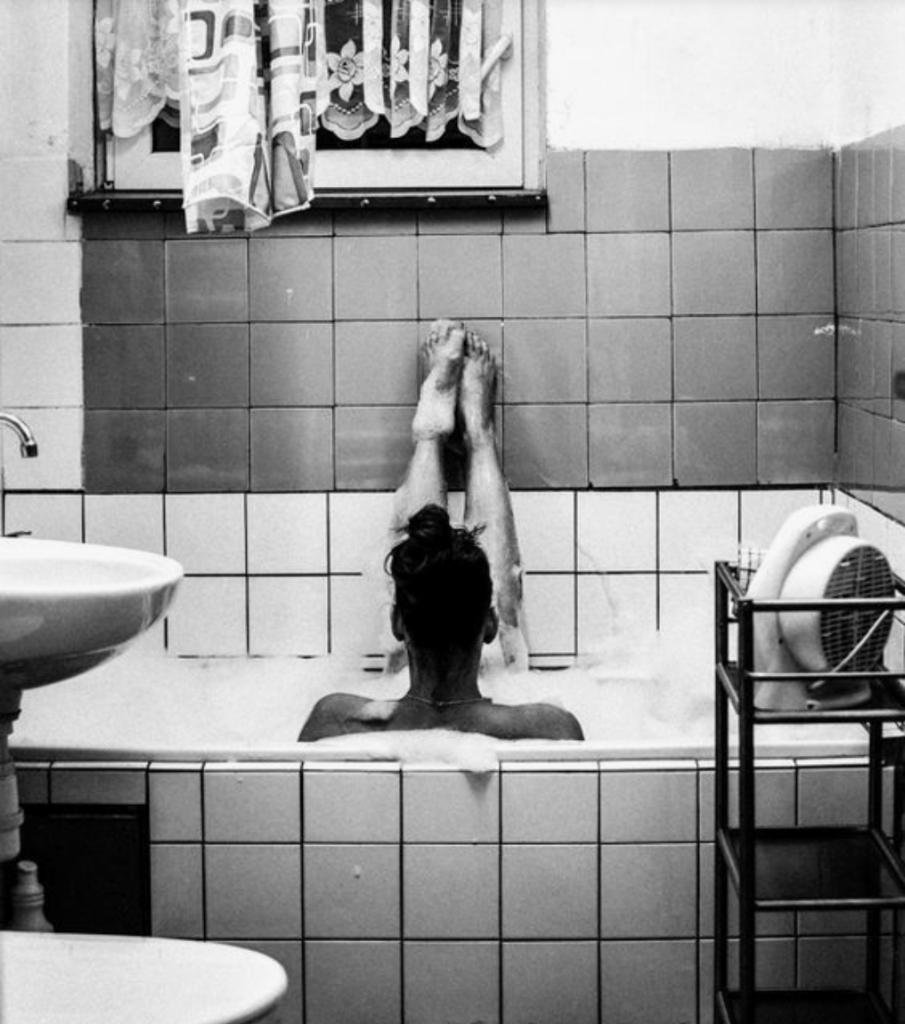
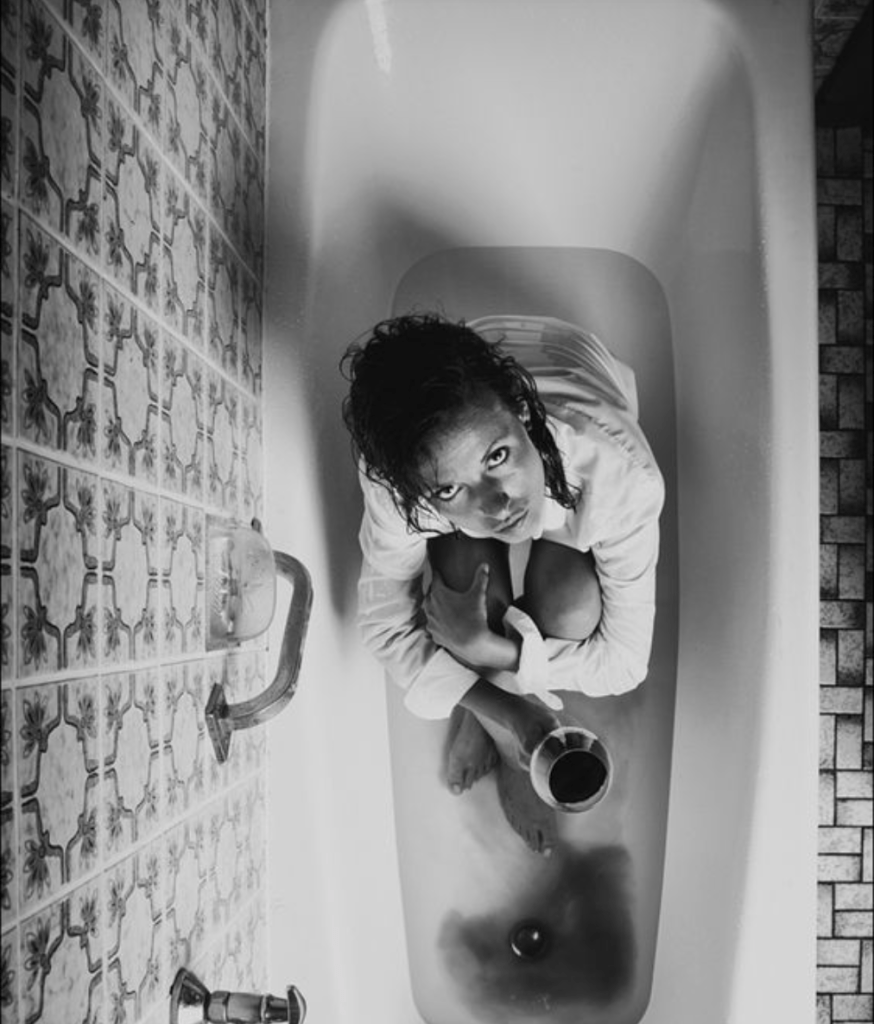
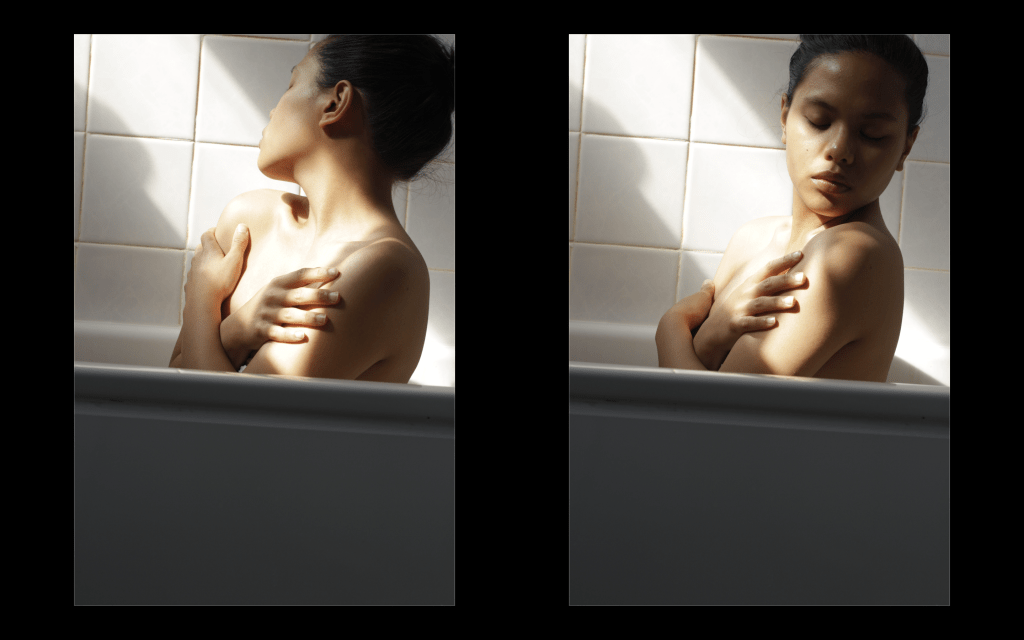
I found these images on pinterest and decided to take some shots in my bath tub in the afternoon since the lighting reflects brightly on the tub.
Pinterest
Below are a few I took:
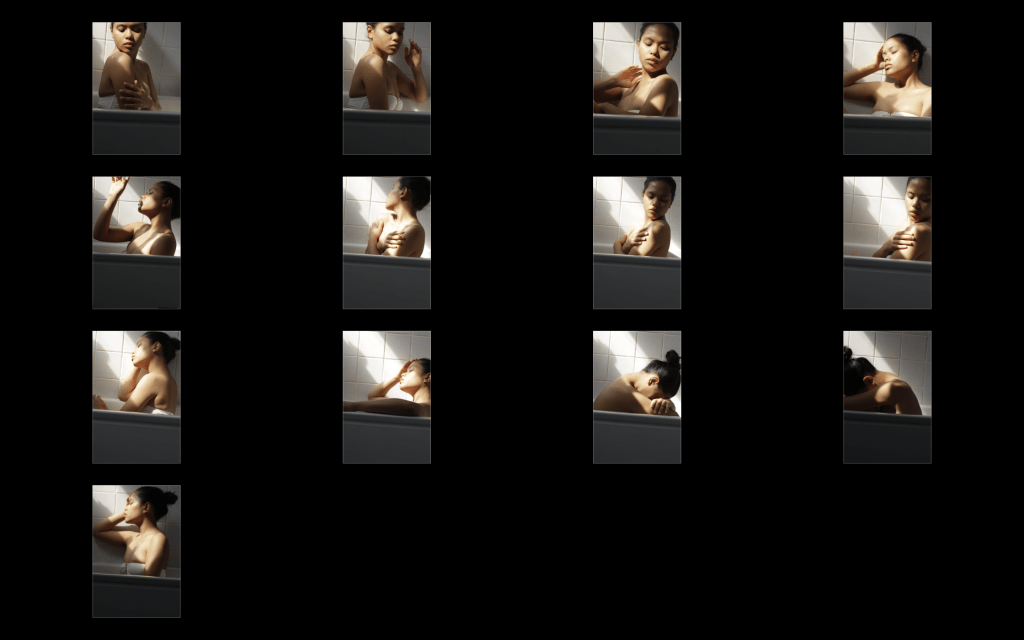
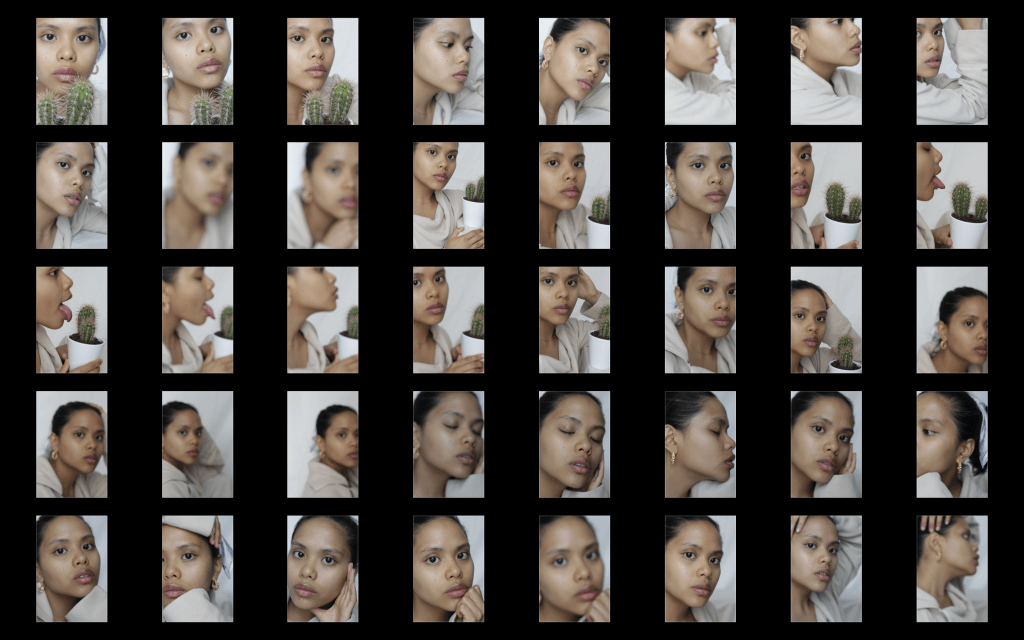
Experiments
I was going for the moody aura and decided to take some mid close up shots to capture my facial expressions. I didn’t take enough pictures as I said before I am quite uncomfortable in the camera hence why but I am quite satisfied with these. I did notice that my camera was quite wonky on my tripod which after the shoot. I have chosen two pictures from this set that I’d like to include as my final images.
Final two images
The reason for choosing these is because they both perfectly capture the moody aura wanted for my project.
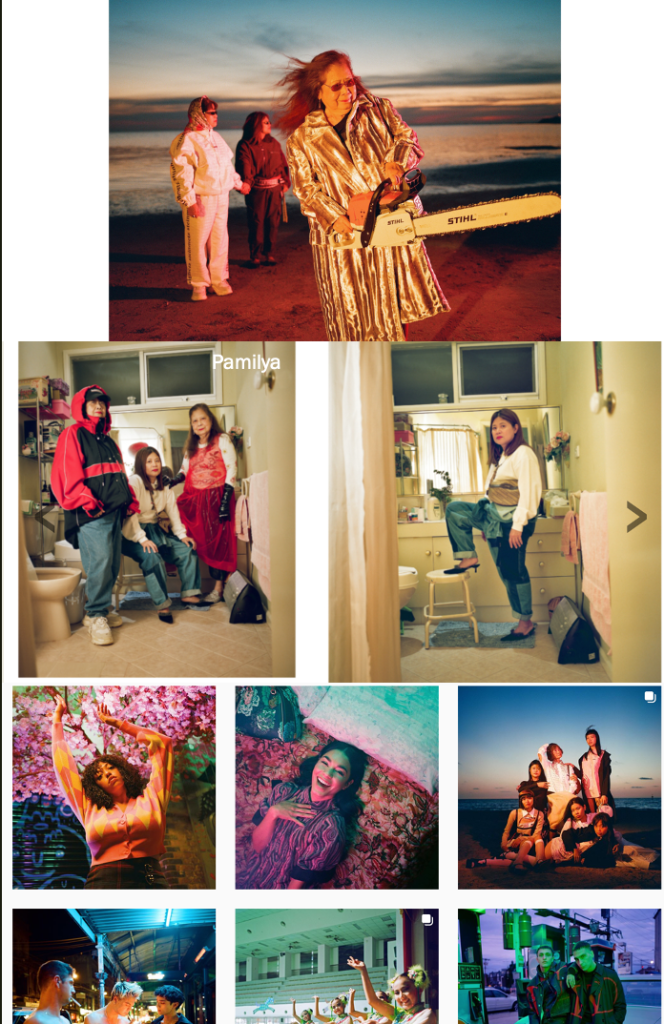
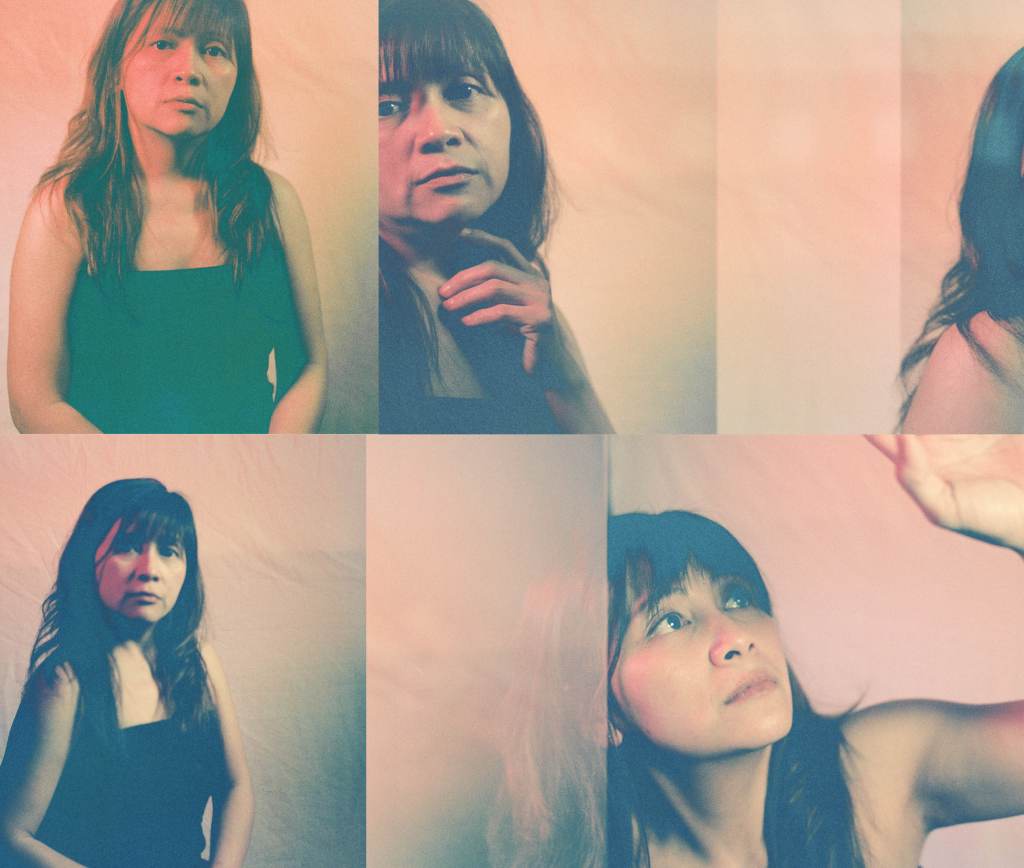
For the new project I decided to focus on self-reflection during the isolation period. I have never done a project on self-portraits and I am not confident in front of the camera on my own so it was a new challenge for me. Firstly, I had a backdrop positioned behind me and set my camera on self-timer. One thing I struggled with is the latter as I couldn’t see whether I was in focused or not resulting in a quite a few blurred shots.
I decided to be bare-faced for the test shoot as I wanted to focus on becoming comfortable in posing and seeing whether the lighting was appropriate. Having a prime lense meant the frame would only be focused from my shoulders upwards. I did have a tripod however since it was a self-reflection I wanted to focus on my self expression and the above are the results.
For the next shoot, I will try to compose my shot so I could capture from my waist up by increasing the height of my tripod and see whether it would work. Otherwise, I will try and research for poses I can try next time.
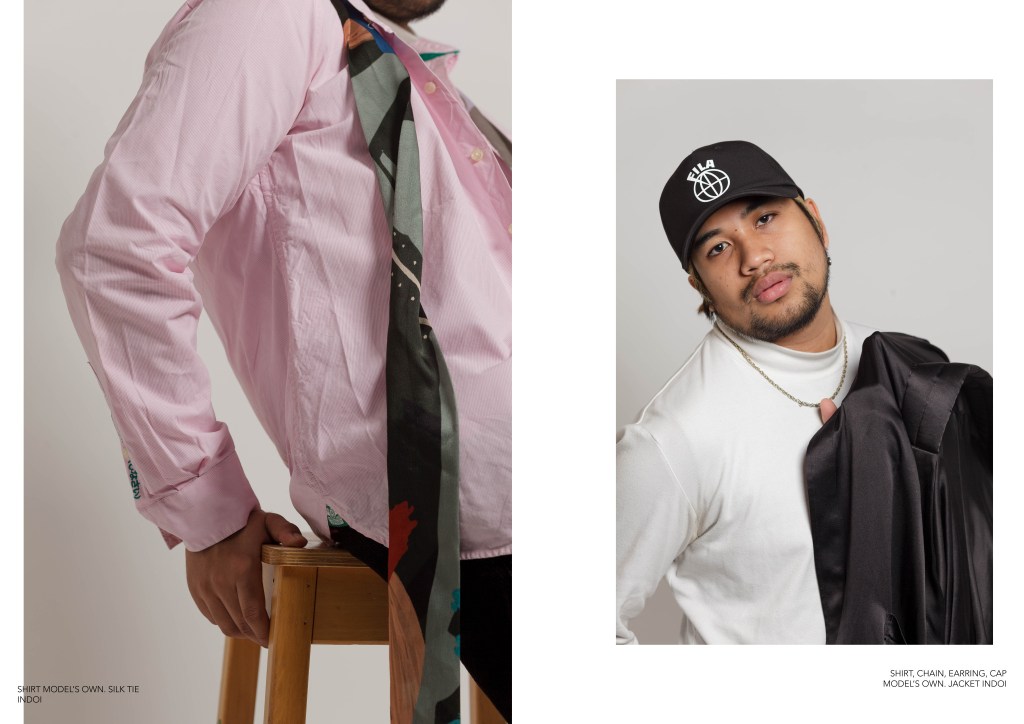
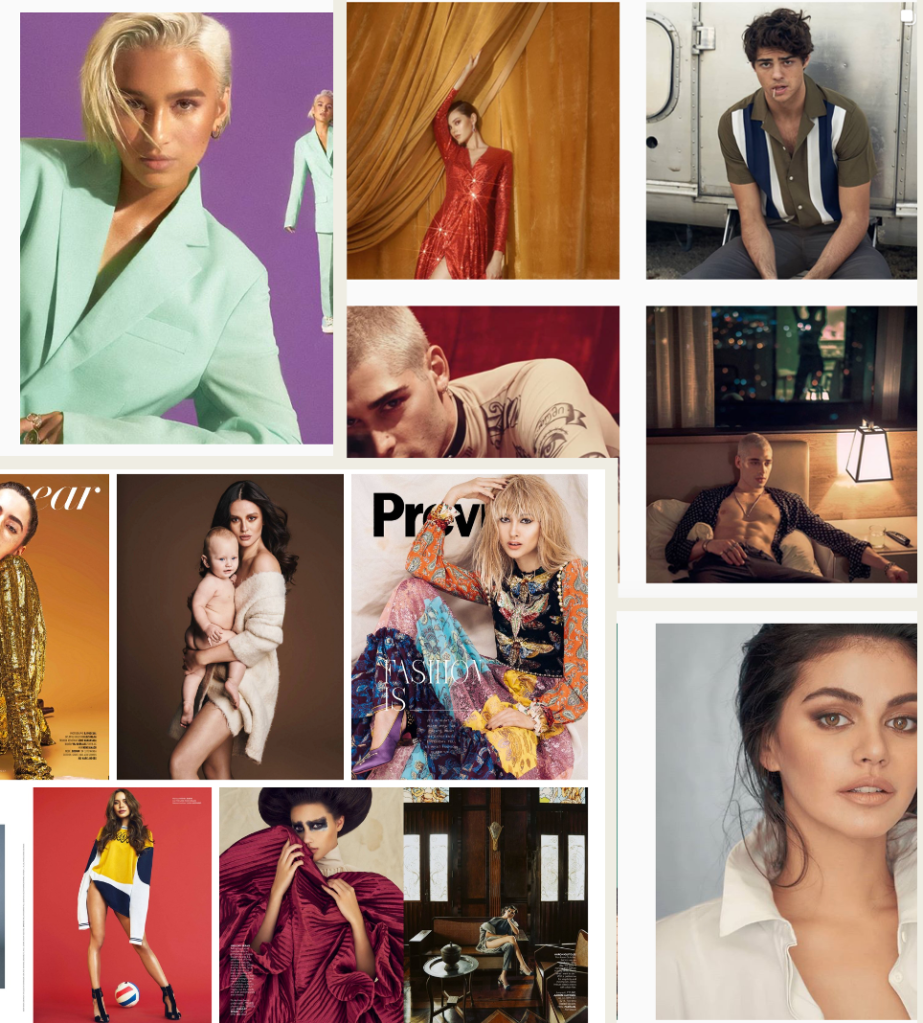
For the Styling Identity, my favourite image is one of the spreads seen below.
Styling Identity
I was aiming for a minimalist look for my spreads so the message of having less clothes and supporting sustainable brands is visible throughout. These two pages reflect this message the most since there is enough negative space to give the images and text space to pop out. I purposely included the cropped image of the model’s clothing to show the audience the simplicity in his outfit. On the right, the model’s relaxed facial expression is to portray the weight lifted off his shoulder’s by applying sustainability in his wardrobe.
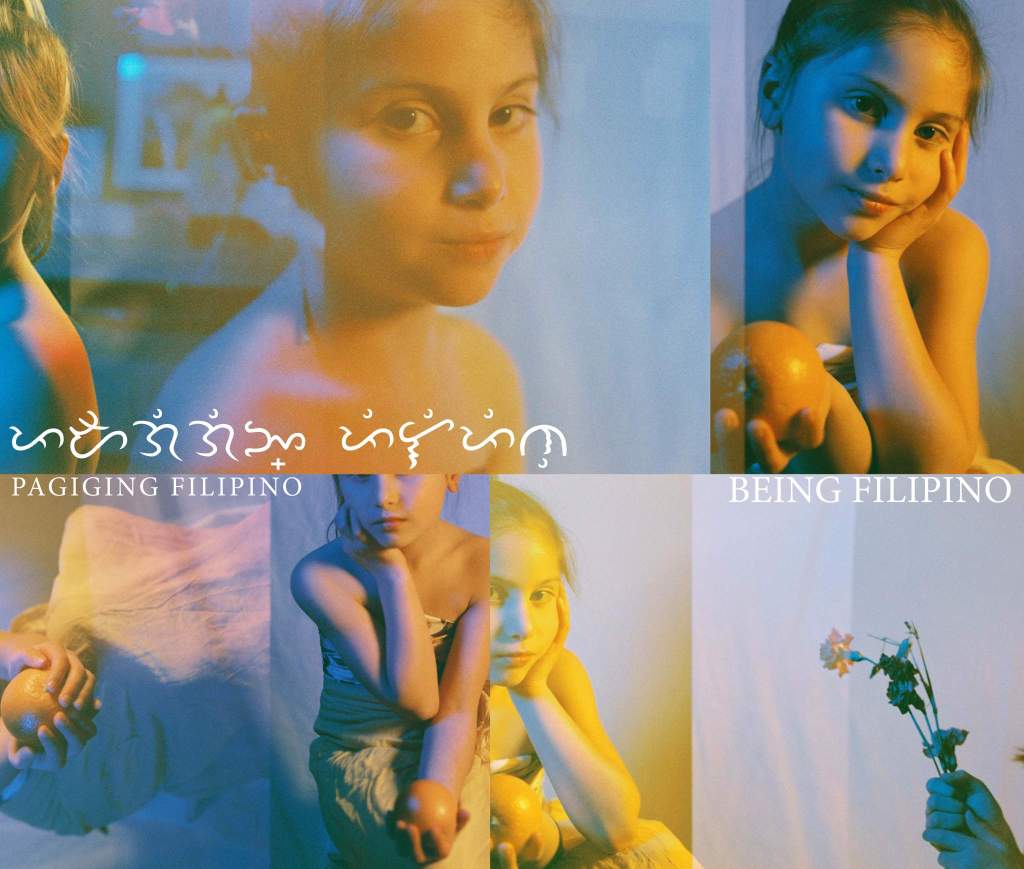
For the Image Making unit, my favourite image is the front cover of my photobook below.
Image Making
These images were shot on 35mm film loaded in my 120mm film camera and so these were experiments I am satisfied with. The overlapping of the images in the original roll gave it a continuous storyline and I preferred how the colours came out lightly saturated compared to the digital ones. Also it shows how confident my little was at modelling to which she enjoyed. This is also the only page that had “Baybayin” written this is to show my appreciation for my culture.
Throughout the two projects I have done, I noticed that we’ve been creating spreads of images (eg: Styling Identity – Magazine spread and Image Making – Photobook) and I would say that this is a great practice for the professional world when we need to display our portfolios onto our websites to show the clients our varied work.
Both units helped me practice self-discipline in preparing shoots, creating a schedule, developing research for each shoot and choosing the right pictures that would in turn make up the final project. Also it showed me various styles I experimented with and allowed me to slowly figure out my style of photography. Starting the course allowed me to try out analogue photography which I have dabbled with in the past but haven’t incorporated in any of my projects and made me realise this is my preferred photography format as it allows myself to be constructive when choosing the right composition and lighting. This comes with the developing and scanning process which I enjoy as I take time to analyse each images outcome.
In both units we had multiple workshops with our technicians to help us and learning more information in these workshops allowed me to input this in my work. For example, my use of ambient lights for Image Making and the high key lighting for the Styling Identity. These helped me further my skills which I will apply on future projects.
Research Tasks and Case Studies (Styling Identity)
For the Styling Identity, choosing i-D as my publication made the process of researching for this project quite easy since it is a magazine I am familiar with and would hopefully work with in the future. Their ethos and layout is what grabbed my attention. Compared to other publications i-D is one my generation can relate to the most.
Since sustainability in fashion was my topic researching for artists, brands, photographers and organisations was appealing to my knowledge. It helped me gain a wider understanding of the topic. My most favoured was looking at fashion brands who actually take the subject seriously. Brands such as Mother of Pearl and Kaan Amjad are amongst the brands I would like to collaborate in the future and recently I actually bought one of Kaan’s sample clothing via their depop and needless to say even as a sample fabric its finish is a perfect staple piece.
Because of my passion for the subject creating this photoshoot was much better than expected. I pushed myself to portray my work as educating to those new to the topic since it is one that should be tackled more in high end and fast fashion brand. My drive to stop these brands from polluting the already overworked planet fuels my passion for this project.
In terms of research since I had access to all of i-D’s issue at my university’s library it was easier for me to know what I wanted to have on my spreads. i-D also has an online website where I can access their previous issue, therefore, research for this unit was more relaxed.
With the beauty of internet, it is much easier to access information, however, the internet is only a place where anyone can dump information so every now and again it is better to use physical resources at the library.
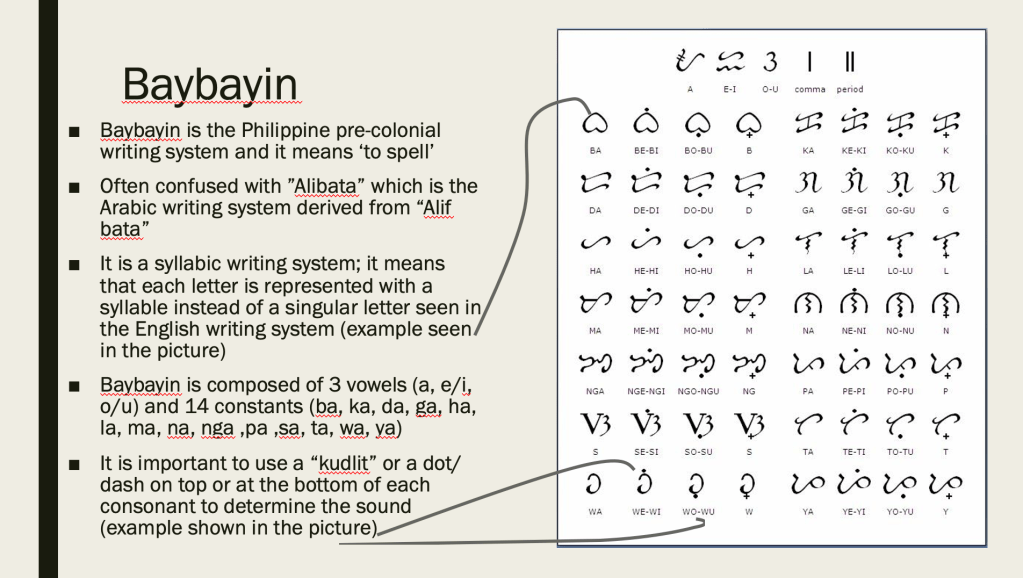
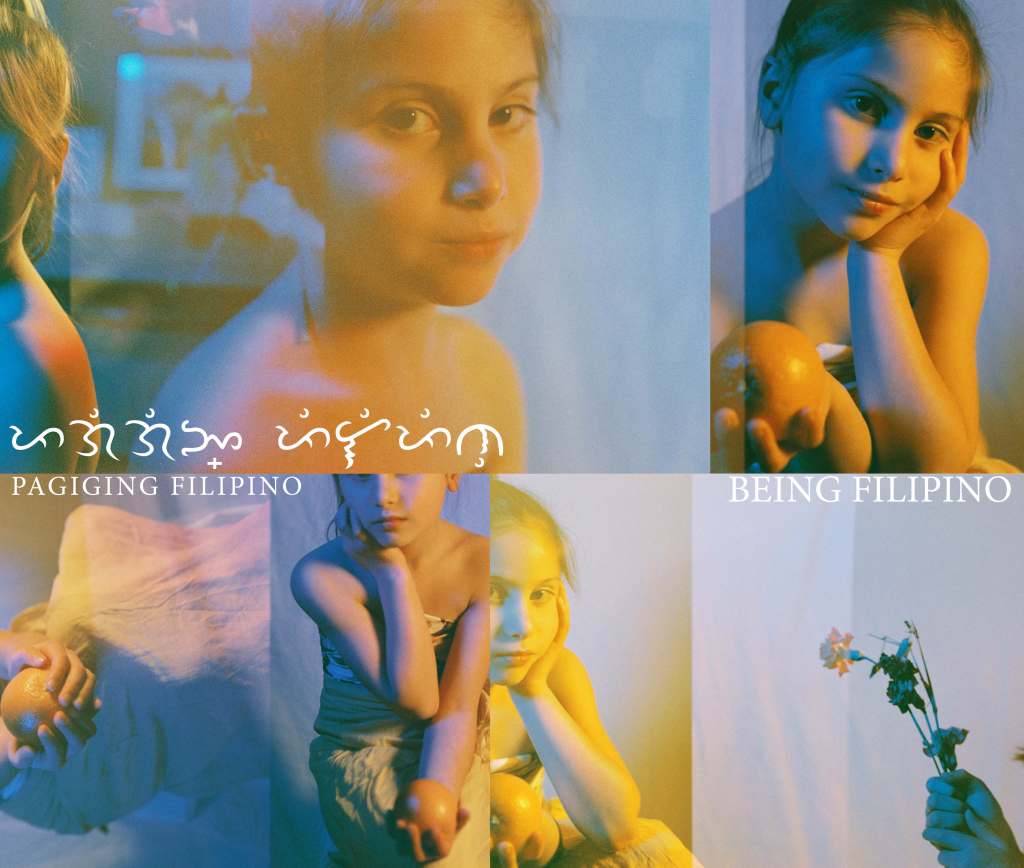
For the Image Making unit, as I further continue my understanding of my Filipino heritage, I particularly enjoyed learning the ‘Baybayin‘ and looking at the colourised images from the Philippine history because it opened my view on my self and what was the root of my culture.
With ‘Baybayin’ I thought it would’ve been difficult to learn it since they were written in characters instead of letters and the modern Filipino alphabet consists of letters. However, with perseverance and more research, learning Baybayin was as easy as learning the modern Filipino language. It dawned on me that we could be writing in this writing system if we weren’t colonised. Therefore, it was important for me to include this somewhere in my work to show and educate not only other races but most importantly Filipinos to appreciate their roots.
Baybayin Research
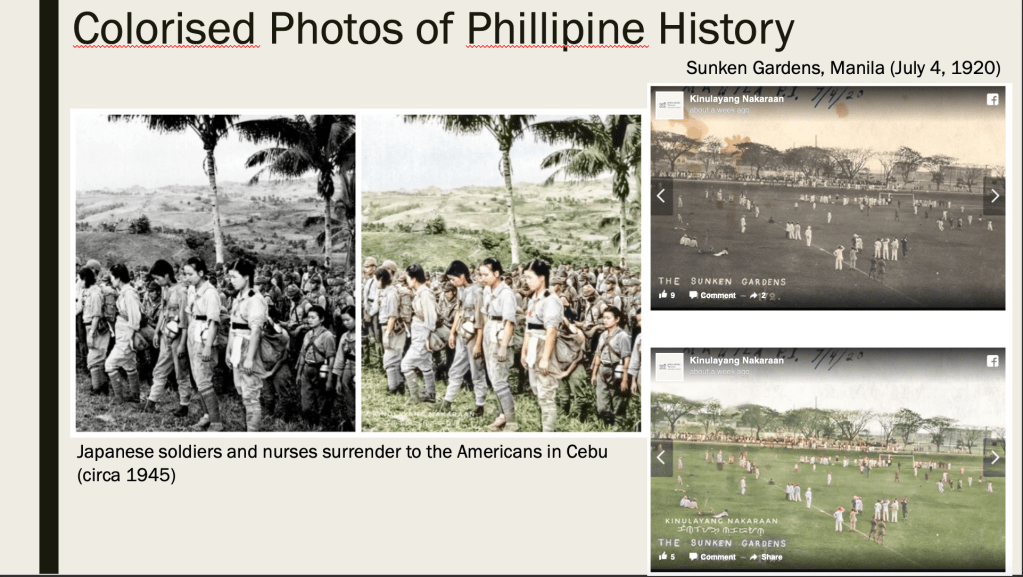
The page “Kinulayang Nakaraan” gave life to the B&W images found from history and a sense of nostalgia to these images. It opened a whole new perspective of what Philippines was like if I lived during those times. It allowed me to understand what my great grandparents’ lives were and understand our the root of our culture.
Moreover, looking at today’s Filipino artists’ works inspired my input on this project. My personal favourites BJ Pascual and James J. Robinson influenced the colours, lighting and composition in my work.
BJ Pascual’s workJames J. Robinson’s work
James’ and BJ’s use of colours truly inspired my input how I compose the lightings on my images, I tried to incorporate the same hues on some images then mix others hues together such as blue and yellow. However, I should have experimented with the light’s intensities. I did wanted to move the lights forwards and backwards but due to the limited space it was challenging.
Example of lightings used
Although I have researched enough to gain an understanding on how to achieve my desired lighting, I should have written or drew the lighting setups I found to give me a visual guide for future projects. Moreover, more test shoots could help myself to understand my surroundings in order to identify where to position each light or perhaps use a reflector where appropriate.
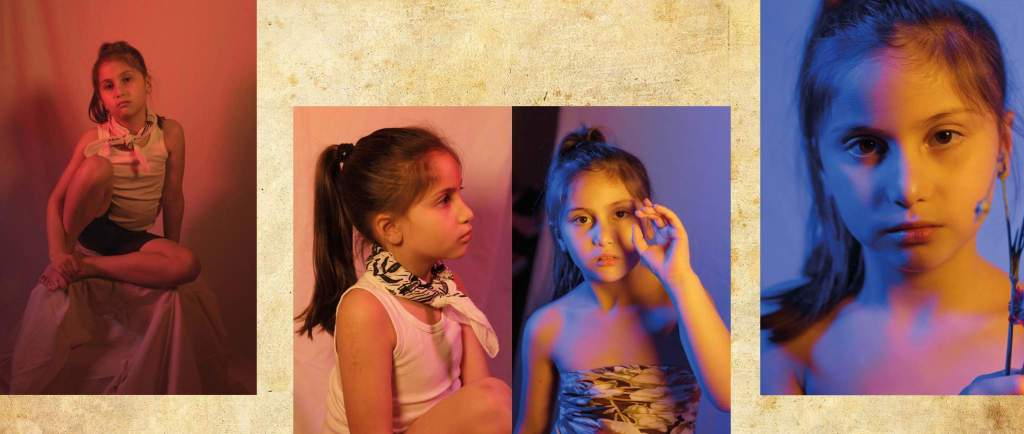
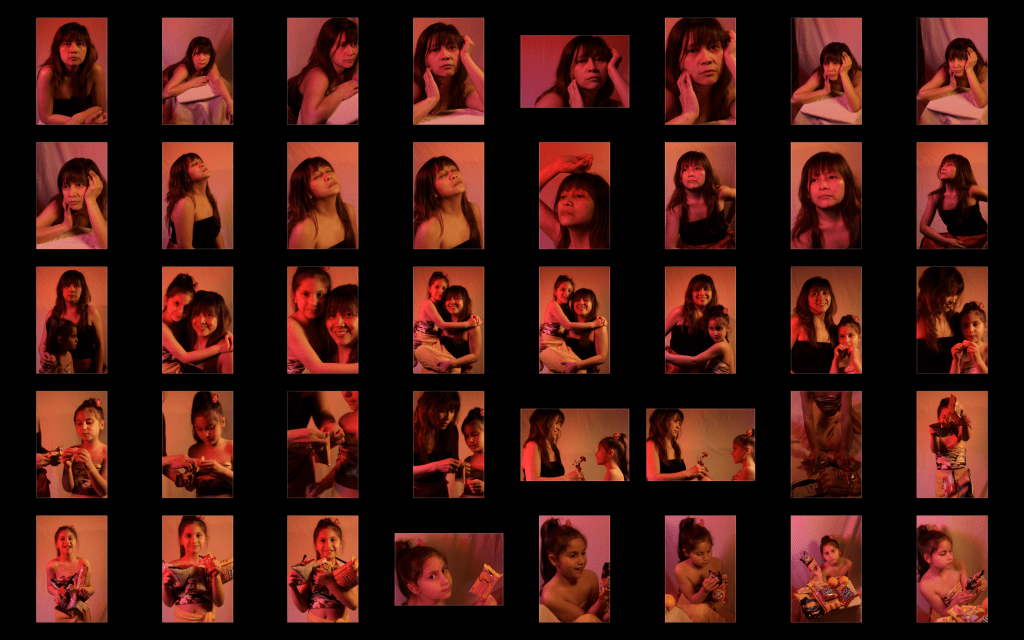
For the Image Making unit, I had mixed feelings for my submission. My main subject is about my Filipino heritage, focusing on the traditional clothing, colours of the Philippine flag and traditional writing system. Initially I contacted modelling agencies regarding using their models of Filipino heritage. However, since it was the beginning of the COVID panic, most agencies by then were more precautious in allowing their models out.
And so I had to think of a contingency plan which was to use my family instead. This was made my project more personal and closer to heart. But as mentioned, my mum who is a nurse was quite busy due to work and my sister had still has school and went to bed earlier and since I wanted to do this shoot with the two together, it was quite tricky.
Test Shoot
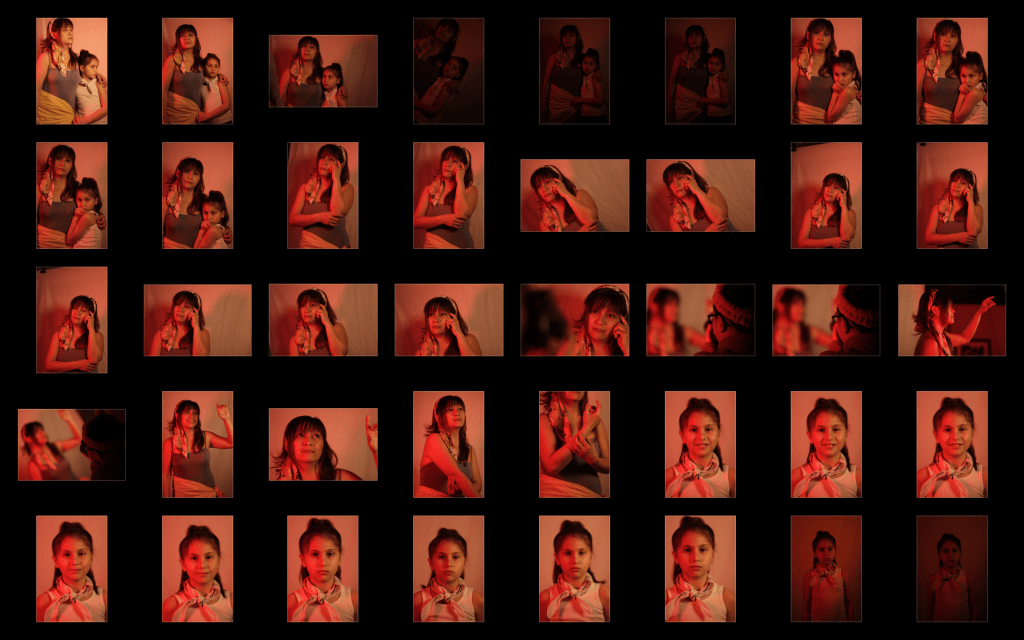
Because I wanted did the shoot during nighttime as I was using ambient lighting, I only had at least an hour and a half for the shoot in total and so I didn’t have much time to experiment with loads of film shot (which is what I wanted my project to be shot in). However, I made it work and the test shoot made me think of what to improve with next.
I also mentioned that I only had an f 1.8 50mm lens and because there wasn’t enough space, full body shots were limited.
Final Shoot
My final shoot went a little bit better than the test shoot in terms that I had more time with my models. However, I would’ve hired out a Canon 5d and any zoom lenses so I can have varied shots but because of the early stages of lockdown I preferred to stay indoors and be safer.
I did enjoy using the Filipino snacks as props and I think my little sister did as well. These snacks are a way of her appreciation to her Filipino heritage since she is half Filipino and half English.
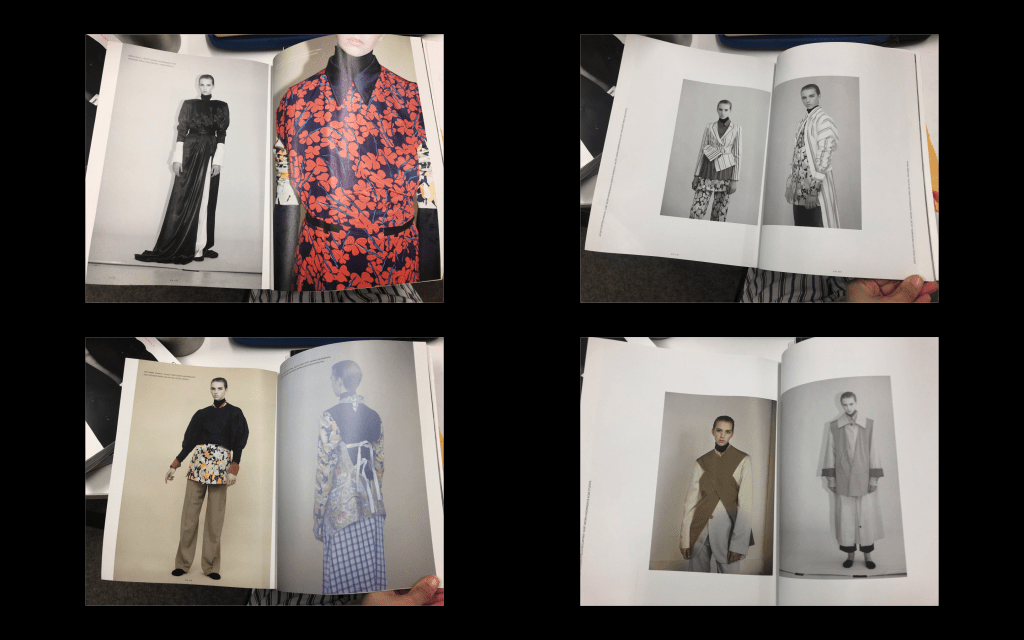
The above images are the spreads from my final photobook. Editing the photobook was quite challenging since I had quite a few images I wanted to add, however, I have narrowed it down to the final images seen. If I had more time, I would’ve created my own background by crumpling and wetting a piece of paper and painting it brown to replicate the antique look I had with the background I ended up using.
What I like most about this photobook is the front and back cover because they are the only film images I took and I liked the colours that came out on these compared to the digital ones. These were taken on my Mamiya 645 camera with a 35mm adapter. Since it was my first time doing this, I have exposed the films and overlapped the films but this is one of the mistakes I liked the most. This is also an experiment I’d love to do for future projects or shoots in the future as it show my perseverance to experiment with ideas outside of my comfort zone.
If I were to change anything, I would’ve hired out a Canon 5d camera with a zoom lenses so I had varied body shots similar to my Styling Identity magazine spread. As well as incorporating more “Baybayin” throughout the spreads by adding texts written in Baybayin, Filipino and English on each page